I finally tracked down and fixed an annoying problem I’ve been having with my Sony Vaio notebook. The pagefile would continue growing until it was full and then no other applications could run. The problem was being caused by a piece of wireless networking software that was writing to the pagefile but not releasing the memory it had written.
David called in to use my computer, he still hasn’t finished re-installing software on his.
Received a parcel from Claire today with photos and other interesting things. 🙂
Welsh class this evening, it’s really difficult getting back into it after the long break.
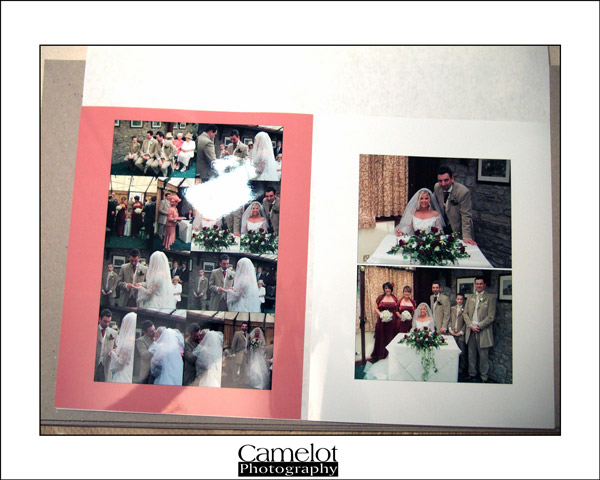
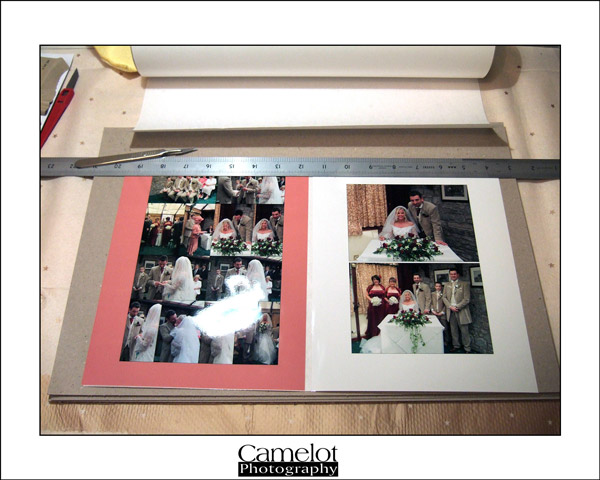
I thought I’d post a few pictures from my Fuji F11 point and shoot camera showing how I prepare photographs for mounting in a Jorgensen E series album (the glare on the gloss images is from my worklight).
The first stage is to unroll some of the 3M pressure mount film and gently press down the photograph to hold it in place. This photograph shows two 10×8 prints (for parent albums) having the mounting film applied.
The roll of mounting film is then trimmed from the top of the print, next using the straight edge as a guide the mounting film is trimmed flush with all the edges of the print using a sharp scalpel. The mounting film will stick aggresively to anything that comes in contact with it!
The individual prints are then placed face down on the release paper and squeeged on the back using the blue squeege blade shown in the photograph to make the pressure bond to the back of the photograph.

The final stage is to remove the backing, align the print on the album page and then applying the release paper to the face of the print squeege over the top of the print to make the bond to the album page permanent.